Connecting Raspberry Pi to AWS IoT has become a popular solution for developers and hobbyists who want to build scalable, secure, and efficient IoT applications. With the rise of smart devices and the Internet of Things (IoT), Raspberry Pi has emerged as a versatile and cost-effective platform for prototyping and deploying IoT projects. By integrating Raspberry Pi with AWS IoT, users can leverage the power of cloud computing to manage, monitor, and analyze their IoT devices in real-time. In this article, we will explore how to connect Raspberry Pi to AWS IoT, step by step, while adhering to best practices for security and scalability.
The Internet of Things (IoT) is transforming industries and everyday life by enabling devices to communicate and share data seamlessly. AWS IoT, Amazon’s cloud-based IoT platform, provides a robust infrastructure for managing IoT devices, ensuring secure communication, and enabling advanced analytics. Raspberry Pi, on the other hand, is a compact yet powerful single-board computer that serves as an ideal gateway for IoT projects. By combining these two technologies, developers can create innovative solutions ranging from home automation systems to industrial monitoring applications.
In this guide, we will walk you through the process of connecting Raspberry Pi to AWS IoT. We will cover everything from setting up your Raspberry Pi and AWS IoT environment to configuring secure communication and testing your setup. Whether you are a beginner or an experienced developer, this article will provide you with the knowledge and tools you need to successfully integrate Raspberry Pi with AWS IoT.
Read also:Mia Khalifa Sax Exploring The Journey Beyond Controversy
Table of Contents
- Introduction to Raspberry Pi and AWS IoT
- Setting Up Your Raspberry Pi
- Creating an AWS IoT Core Environment
- Configuring Secure Communication
- Installing and Configuring the AWS IoT SDK
- Testing Your Connection
- Advanced Features and Use Cases
- Best Practices for Security
- Troubleshooting Common Issues
- Conclusion
Introduction to Raspberry Pi and AWS IoT
Raspberry Pi is a small, affordable computer that has gained immense popularity among hobbyists, educators, and developers. Its versatility and low cost make it an excellent choice for IoT projects. With GPIO (General Purpose Input/Output) pins, Raspberry Pi can interact with sensors, actuators, and other hardware components, making it a powerful tool for building IoT applications.
AWS IoT, part of Amazon Web Services, is a managed cloud platform that enables secure communication between IoT devices and the cloud. It provides features such as device authentication, data encryption, and real-time data processing. By connecting Raspberry Pi to AWS IoT, users can take advantage of AWS’s scalability and reliability to manage their IoT devices effectively.
Key Benefits of Connecting Raspberry Pi to AWS IoT
- Scalability: AWS IoT can handle millions of devices and billions of messages, making it suitable for large-scale IoT deployments.
- Security: AWS IoT uses end-to-end encryption and authentication to ensure secure communication between devices and the cloud.
- Real-time Data Processing: AWS IoT integrates with other AWS services, such as Lambda and DynamoDB, to enable real-time data analysis and decision-making.
- Cost-Effectiveness: AWS IoT offers a pay-as-you-go pricing model, allowing users to scale their IoT applications without incurring unnecessary costs.
Setting Up Your Raspberry Pi
Before connecting Raspberry Pi to AWS IoT, you need to set up your Raspberry Pi environment. This involves installing the operating system, configuring network settings, and updating the system software.
Step 1: Install the Operating System
Raspberry Pi supports various operating systems, but the most commonly used one is Raspberry Pi OS (formerly Raspbian). To install Raspberry Pi OS, follow these steps:
- Download the Raspberry Pi Imager tool from the official Raspberry Pi website.
- Insert a microSD card into your computer and use the Raspberry Pi Imager to write the OS image to the card.
- Insert the microSD card into your Raspberry Pi and power it on.
- Follow the on-screen instructions to complete the setup process.
Step 2: Configure Network Settings
Ensure that your Raspberry Pi is connected to the internet. You can connect via Wi-Fi or Ethernet, depending on your setup. To configure Wi-Fi, use the following command:
sudo nano /etc/wpa_supplicant/wpa_supplicant.confAdd your Wi-Fi credentials to the file and save it. Restart the Raspberry Pi to apply the changes.
Read also:Aaliyah Yasin Rising Star In The Spotlight
Step 3: Update the System
Run the following commands to update your Raspberry Pi’s software:
sudo apt update sudo apt upgradeCreating an AWS IoT Core Environment
Once your Raspberry Pi is ready, the next step is to set up an AWS IoT Core environment. This involves creating an AWS account, configuring an IoT Core service, and generating security credentials.
Step 1: Create an AWS Account
If you don’t already have an AWS account, sign up at AWS. Once you have an account, log in to the AWS Management Console.
Step 2: Create an IoT Thing
In the AWS IoT Core console, create a new "thing" to represent your Raspberry Pi:
- Go to the AWS IoT Core dashboard and click on "Manage"> "Things."
- Click "Create" and follow the prompts to register a new thing.
- Assign a name to your thing (e.g., "RaspberryPiThing").
Step 3: Generate Security Credentials
Download the security credentials (certificate, private key, and root CA) for your IoT thing. These credentials will be used to authenticate your Raspberry Pi with AWS IoT.
Configuring Secure Communication
Secure communication is a critical aspect of connecting Raspberry Pi to AWS IoT. AWS IoT uses MQTT (Message Queuing Telemetry Transport) protocol over TLS (Transport Layer Security) to ensure secure data transmission.
Step 1: Install MQTT Client
Install the Mosquitto MQTT client on your Raspberry Pi:
sudo apt install mosquitto mosquitto-clientsStep 2: Configure Certificates
Copy the downloaded security credentials to your Raspberry Pi and configure the MQTT client to use them:
sudo nano /etc/mosquitto/mosquitto.confAdd the following lines to the configuration file:
cafile /path/to/root-CA.crt certfile /path/to/certificate.crt keyfile /path/to/private.keyInstalling and Configuring the AWS IoT SDK
AWS provides an SDK for Python (Boto3) that simplifies the process of interacting with AWS IoT. Install and configure the SDK on your Raspberry Pi:
pip install boto3Step 1: Create a Python Script
Write a Python script to publish and subscribe to MQTT topics:
import boto3 from AWSIoTPythonSDK.MQTTLib import AWSIoTMQTTClient # Initialize the MQTT client client = AWSIoTMQTTClient("RaspberryPiThing") client.configureEndpoint("your-endpoint.amazonaws.com", 8883) client.configureCredentials("/path/to/root-CA.crt", "/path/to/private.key", "/path/to/certificate.crt") # Connect to AWS IoT client.connect() # Publish a message client.publish("test/topic", "Hello from Raspberry Pi", 1) Testing Your Connection
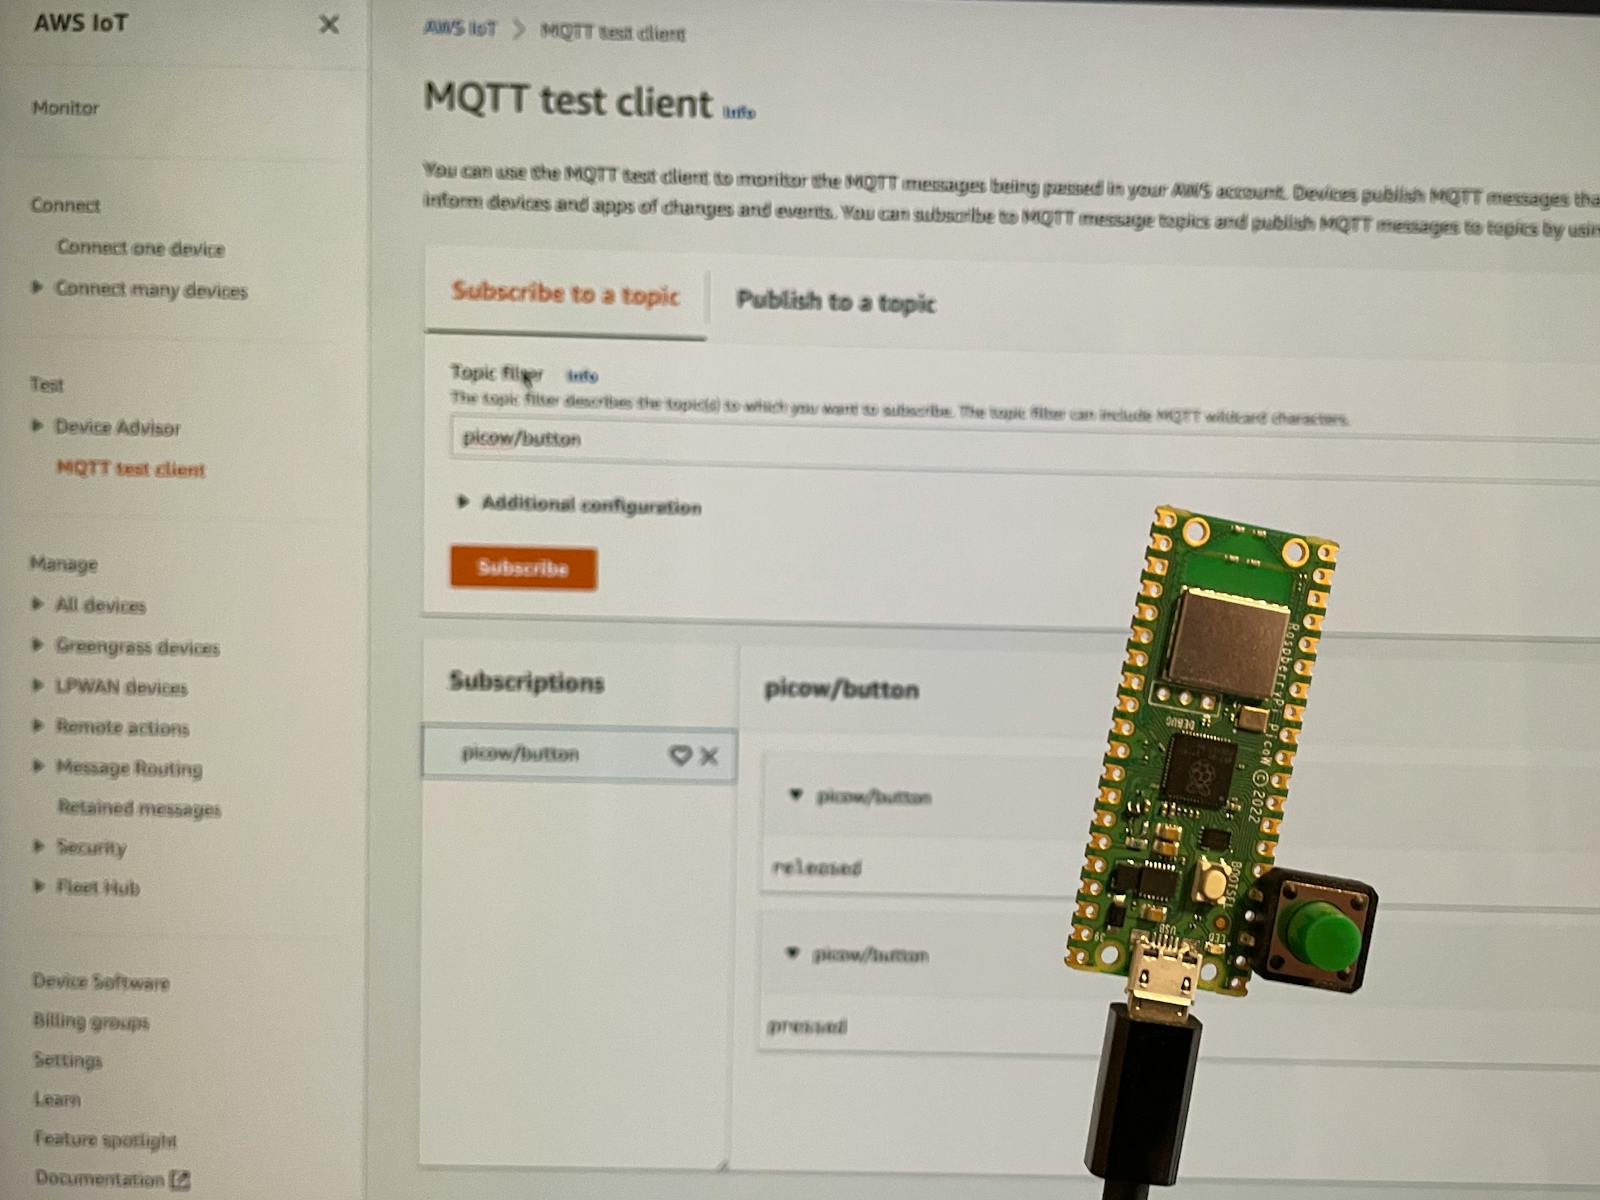
After configuring your Raspberry Pi and AWS IoT environment, test the connection to ensure everything is working correctly:
- Run the Python script to publish a message to an MQTT topic.
- Monitor the AWS IoT Core console to verify that the message is received.
- Subscribe to the topic using the Mosquitto client to confirm that the message is published successfully.
Advanced Features and Use Cases
Once your Raspberry Pi is connected to AWS IoT, you can explore advanced features and use cases to enhance your IoT application.
Device Shadow Service
The Device Shadow service allows you to store and retrieve the state of your IoT devices. This is useful for scenarios where the device is temporarily offline.
Rules Engine
The Rules Engine enables you to process and route data from your IoT devices to other AWS services, such as Lambda, S3, or DynamoDB.
Best Practices for Security
Security is a top priority when connecting Raspberry Pi to AWS IoT. Follow these best practices to ensure a secure setup:
- Use strong passwords and enable two-factor authentication for your AWS account.
- Regularly update your Raspberry Pi’s operating system and software.
- Restrict access to your IoT devices using IAM roles and policies.
Troubleshooting Common Issues
If you encounter issues while connecting Raspberry Pi to AWS IoT, consider the following troubleshooting steps:
- Verify that your security credentials are correctly configured.
- Check the network connectivity of your Raspberry Pi.
- Review the AWS IoT Core logs for error messages.
Conclusion
Connecting Raspberry Pi to AWS IoT opens up a world of possibilities for building innovative IoT applications. By following the steps outlined in this guide, you can set up a secure and scalable IoT environment that leverages the power of AWS cloud services. Remember to adhere to best practices for security and explore advanced features to take your IoT projects to the next level.
We hope this article has provided you with valuable insights into connecting Raspberry Pi to AWS IoT. If you have any questions or feedback, feel free to leave a comment below. Don’t forget to share this article with others who might find it useful and explore more content on our website!