Connecting to your Raspberry Pi over the internet via SSH can unlock a world of possibilities. Whether you're managing a remote server, automating tasks, or simply accessing your Pi from anywhere, SSH (Secure Shell) is a powerful tool that ensures secure communication between devices. This guide will walk you through everything you need to know about setting up and connecting to your Raspberry Pi over the internet using SSH. By the end of this article, you'll have a clear understanding of the process, including how to configure your Pi, secure your connection, and troubleshoot common issues.
SSH is not only a secure way to access your Raspberry Pi remotely, but it also allows you to execute commands, transfer files, and manage your device without needing physical access. However, connecting over the internet introduces additional challenges, such as port forwarding, dynamic IP addresses, and potential security risks. This article will address these concerns and provide step-by-step instructions to ensure a smooth and secure setup.
Before diving into the technical details, it's important to understand why SSH is a preferred method for remote access. Unlike other protocols, SSH encrypts all data transmitted between your computer and the Raspberry Pi, protecting it from unauthorized access. This makes it ideal for tasks that involve sensitive information, such as managing a home automation system or hosting a web server. Now, let's explore how you can set up and connect to your Raspberry Pi SSH over the internet.
Read also:Understanding The Reasons Behind The Little Couples Divorce
Table of Contents
- Introduction to SSH
- Prerequisites for SSH Over the Internet
- How to Enable SSH on Raspberry Pi
- Configuring Your Network for SSH
- Securing Your SSH Connection
- Connecting to Raspberry Pi via SSH
- Troubleshooting Common Issues
- Best Practices for SSH Over the Internet
- Conclusion
Introduction to SSH
SSH, or Secure Shell, is a cryptographic network protocol used for secure communication between two devices over an unsecured network. It is widely used for remote administration of servers, file transfers, and executing commands on a remote machine. SSH ensures that all data exchanged between your computer and the Raspberry Pi is encrypted, making it nearly impossible for attackers to intercept or manipulate the communication.
The SSH protocol operates on port 22 by default, but this can be changed to enhance security. When connecting to your Raspberry Pi over the internet, you'll need to ensure that your network is properly configured to allow SSH traffic. This involves setting up port forwarding on your router, assigning a static IP address to your Pi, and potentially using a Dynamic DNS service if your ISP assigns a dynamic IP address.
One of the key advantages of SSH is its versatility. You can use it not only for remote access but also for tunneling other protocols, such as VNC or HTTP, through the encrypted SSH connection. This makes it an essential tool for anyone looking to manage their Raspberry Pi securely over the internet.
Prerequisites for SSH Over the Internet
Before you can connect to your Raspberry Pi via SSH over the internet, there are a few prerequisites you'll need to fulfill. First and foremost, you need a Raspberry Pi running a compatible operating system, such as Raspberry Pi OS. Ensure that your Pi is connected to your local network and has internet access.
You'll also need access to your router's admin panel to configure port forwarding. This process allows external devices to communicate with your Raspberry Pi through your router. Additionally, it's highly recommended to use a Dynamic DNS service if your ISP assigns a dynamic IP address. This ensures that you can always reach your Pi, even if your public IP address changes.
Lastly, ensure that your Raspberry Pi has a static IP address on your local network. This prevents the IP address from changing every time the Pi restarts, which could disrupt your SSH connection. You can configure a static IP address either through your router or directly on the Pi.
Read also:Unlocking The Mystery Understanding Tiktok Private Account Viewer
How to Enable SSH on Raspberry Pi
To enable SSH on your Raspberry Pi, you'll need to access its configuration settings. If you're using Raspberry Pi OS, SSH can be enabled through the terminal or the desktop interface. Here's how to do it:
- Open the terminal on your Raspberry Pi and type
sudo raspi-config. - Navigate to Interfacing Options and select SSH.
- Choose Yes to enable SSH and exit the configuration tool.
Alternatively, if you're using the desktop interface, you can enable SSH by going to the Preferences menu and selecting Raspberry Pi Configuration. Under the Interfaces tab, enable SSH.
Once SSH is enabled, you can test the connection locally by using another device on the same network. Open a terminal or SSH client and type ssh pi@. Replace
Configuring Your Network for SSH
To connect to your Raspberry Pi over the internet, you'll need to configure your network to allow SSH traffic. This involves setting up port forwarding on your router and potentially using a Dynamic DNS service.
Setting Up Port Forwarding
Port forwarding allows external devices to communicate with your Raspberry Pi through your router. Here's how to set it up:
- Access your router's admin panel by entering its IP address in a web browser.
- Navigate to the Port Forwarding section (this may be under Advanced Settings).
- Create a new rule to forward port 22 (or a custom port) to your Raspberry Pi's local IP address.
- Save the changes and restart your router if necessary.
It's important to note that using the default SSH port (22) can make your Pi more vulnerable to brute-force attacks. To enhance security, consider changing the SSH port to a non-standard value, such as 2222.
Using Dynamic DNS for Stability
If your ISP assigns a dynamic IP address, your public IP may change periodically. To avoid this issue, you can use a Dynamic DNS (DDNS) service, which maps a domain name to your changing IP address. Popular DDNS providers include No-IP, DuckDNS, and Dynu.
- Create an account with a DDNS provider and choose a domain name.
- Install the DDNS client on your Raspberry Pi or configure it on your router.
- Ensure the DDNS service is running and updating your IP address automatically.
With port forwarding and DDNS configured, you're ready to connect to your Raspberry Pi over the internet.
Securing Your SSH Connection
Security is paramount when connecting to your Raspberry Pi over the internet. Here are some best practices to enhance the security of your SSH connection:
- Change the Default Password: The default username and password for Raspberry Pi are widely known. Change them immediately to prevent unauthorized access.
- Use SSH Keys: Instead of relying on passwords, use SSH key pairs for authentication. This method is more secure and eliminates the risk of brute-force attacks.
- Disable Root Login: Prevent direct login as the root user by disabling this option in the SSH configuration file.
- Enable a Firewall: Use a firewall like UFW (Uncomplicated Firewall) to restrict access to your Pi and block unauthorized traffic.
By implementing these measures, you can significantly reduce the risk of your Raspberry Pi being compromised.
Connecting to Raspberry Pi via SSH
Once your network is configured and SSH is secured, you can connect to your Raspberry Pi over the internet. Follow these steps:
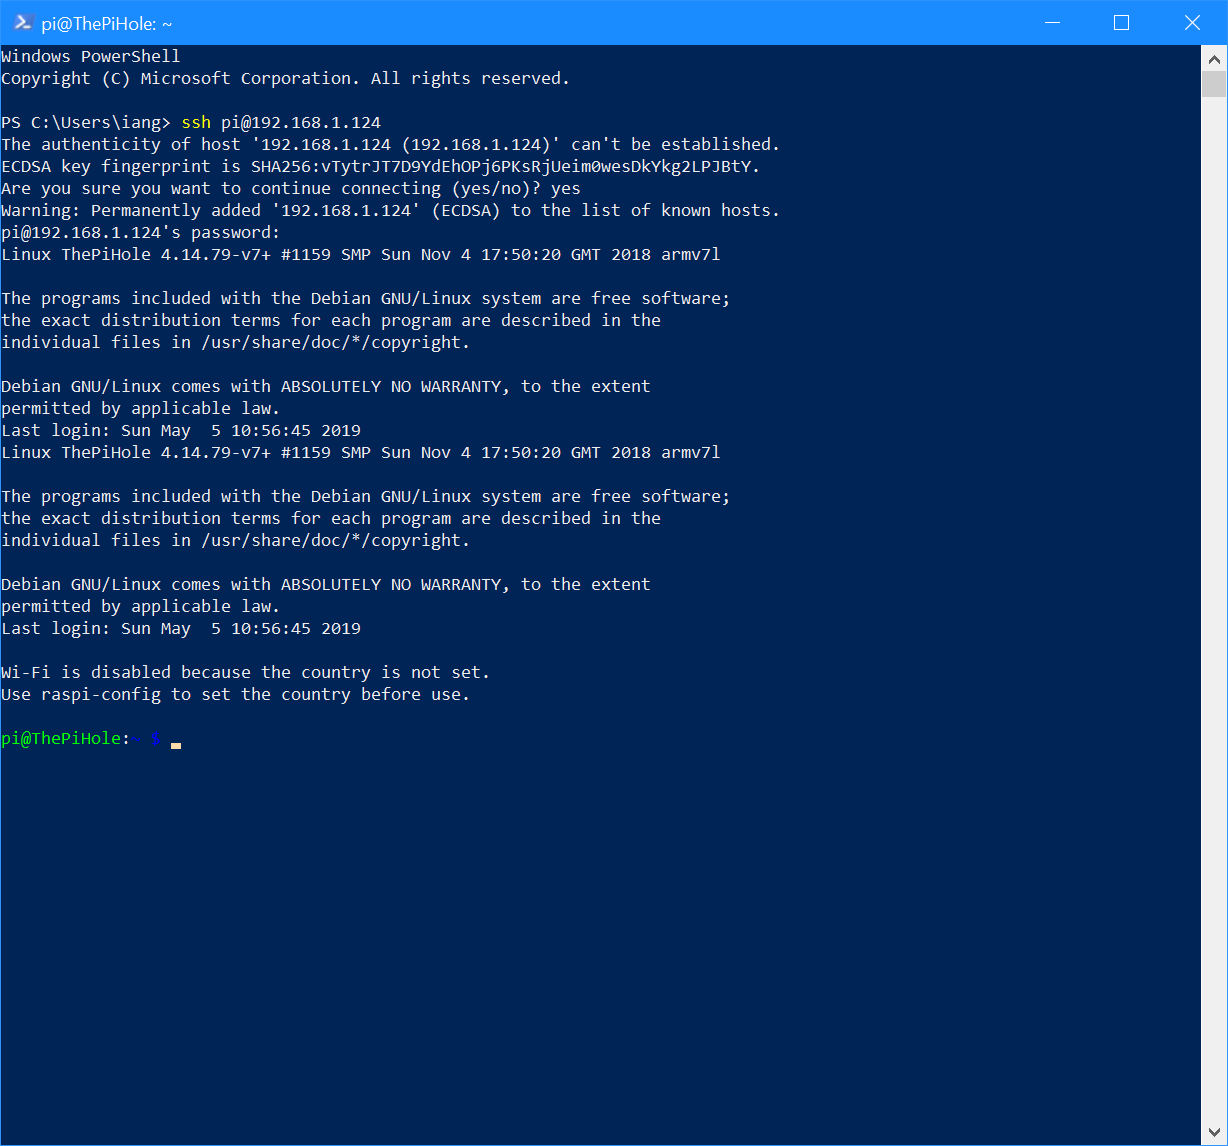
- Open a terminal or SSH client on your computer.
- Type
ssh pi@orssh pi@if you're using a DDNS service. - Enter your password or use your SSH key for authentication.
If the connection is successful, you'll have full access to your Raspberry Pi from anywhere in the world. Remember to test the connection regularly to ensure everything is working as expected.
Troubleshooting Common Issues
While setting up SSH over the internet, you may encounter some common issues. Here are a few troubleshooting tips:
- Connection Refused: Ensure that port forwarding is correctly configured and that your router's firewall is not blocking SSH traffic.
- Incorrect IP Address: Verify that you're using the correct public IP address or DDNS domain name.
- Authentication Failed: Double-check your username and password or SSH key configuration.
If you're still experiencing issues, consult your router's documentation or seek assistance from online forums.
Best Practices for SSH Over the Internet
To maintain a secure and reliable SSH connection, follow these best practices:
- Regularly update your Raspberry Pi's operating system and software to patch vulnerabilities.
- Monitor SSH logs for suspicious activity and take action if necessary.
- Limit SSH access to specific IP addresses using your router or firewall.
By adhering to these guidelines, you can ensure a safe and efficient remote access experience.
Conclusion
Connecting to your Raspberry Pi via SSH over the internet is a powerful way to manage your device remotely. By following the steps outlined in this guide, you can set up a secure and reliable connection that allows you to access your Pi from anywhere. From enabling SSH to configuring your network and securing your connection, each step is crucial to ensuring a seamless experience.
We hope this article has provided you with the knowledge and tools you need to successfully connect to your Raspberry Pi over the internet. If you found this guide helpful, feel free to share it with others or leave a comment below. For more tips and tutorials, explore our other articles on Raspberry Pi and remote access solutions.