SSH Raspberry Pi has become an essential tool for tech enthusiasts and professionals who want to remotely manage their devices securely. Whether you're a hobbyist building a home automation system or a developer managing a network of IoT devices, understanding how to use SSH (Secure Shell) with Raspberry Pi is crucial. This article dives deep into the world of SSH Raspberry Pi, covering everything from basic setup to advanced configurations, ensuring you have the expertise to manage your devices efficiently and securely.
For those new to the concept, SSH Raspberry Pi allows you to access the command line of your Raspberry Pi from another computer over a network. This capability is invaluable for managing your devices without needing physical access, saving time and resources. In today’s digital age, where remote work and smart home technologies are becoming the norm, mastering SSH Raspberry Pi is more important than ever.
Throughout this article, we will explore the intricacies of SSH Raspberry Pi, providing you with a thorough understanding of its functionalities and benefits. We'll cover the necessary steps to set up SSH, discuss best practices for maintaining security, and delve into advanced features that can enhance your experience. By the end, you'll have a comprehensive grasp of how to leverage SSH Raspberry Pi to its fullest potential.
Read also:Unveiling The Legacy Of Ms Sethi A Journey Of Inspiration And Excellence
Table of Contents
Introduction to SSH
SSH, or Secure Shell, is a cryptographic network protocol used for secure data communication, remote command-line login, remote command execution, and other secure network services between two networked computers. It was designed as a replacement for insecure protocols like Telnet and provides a secure channel over an unsecured network.
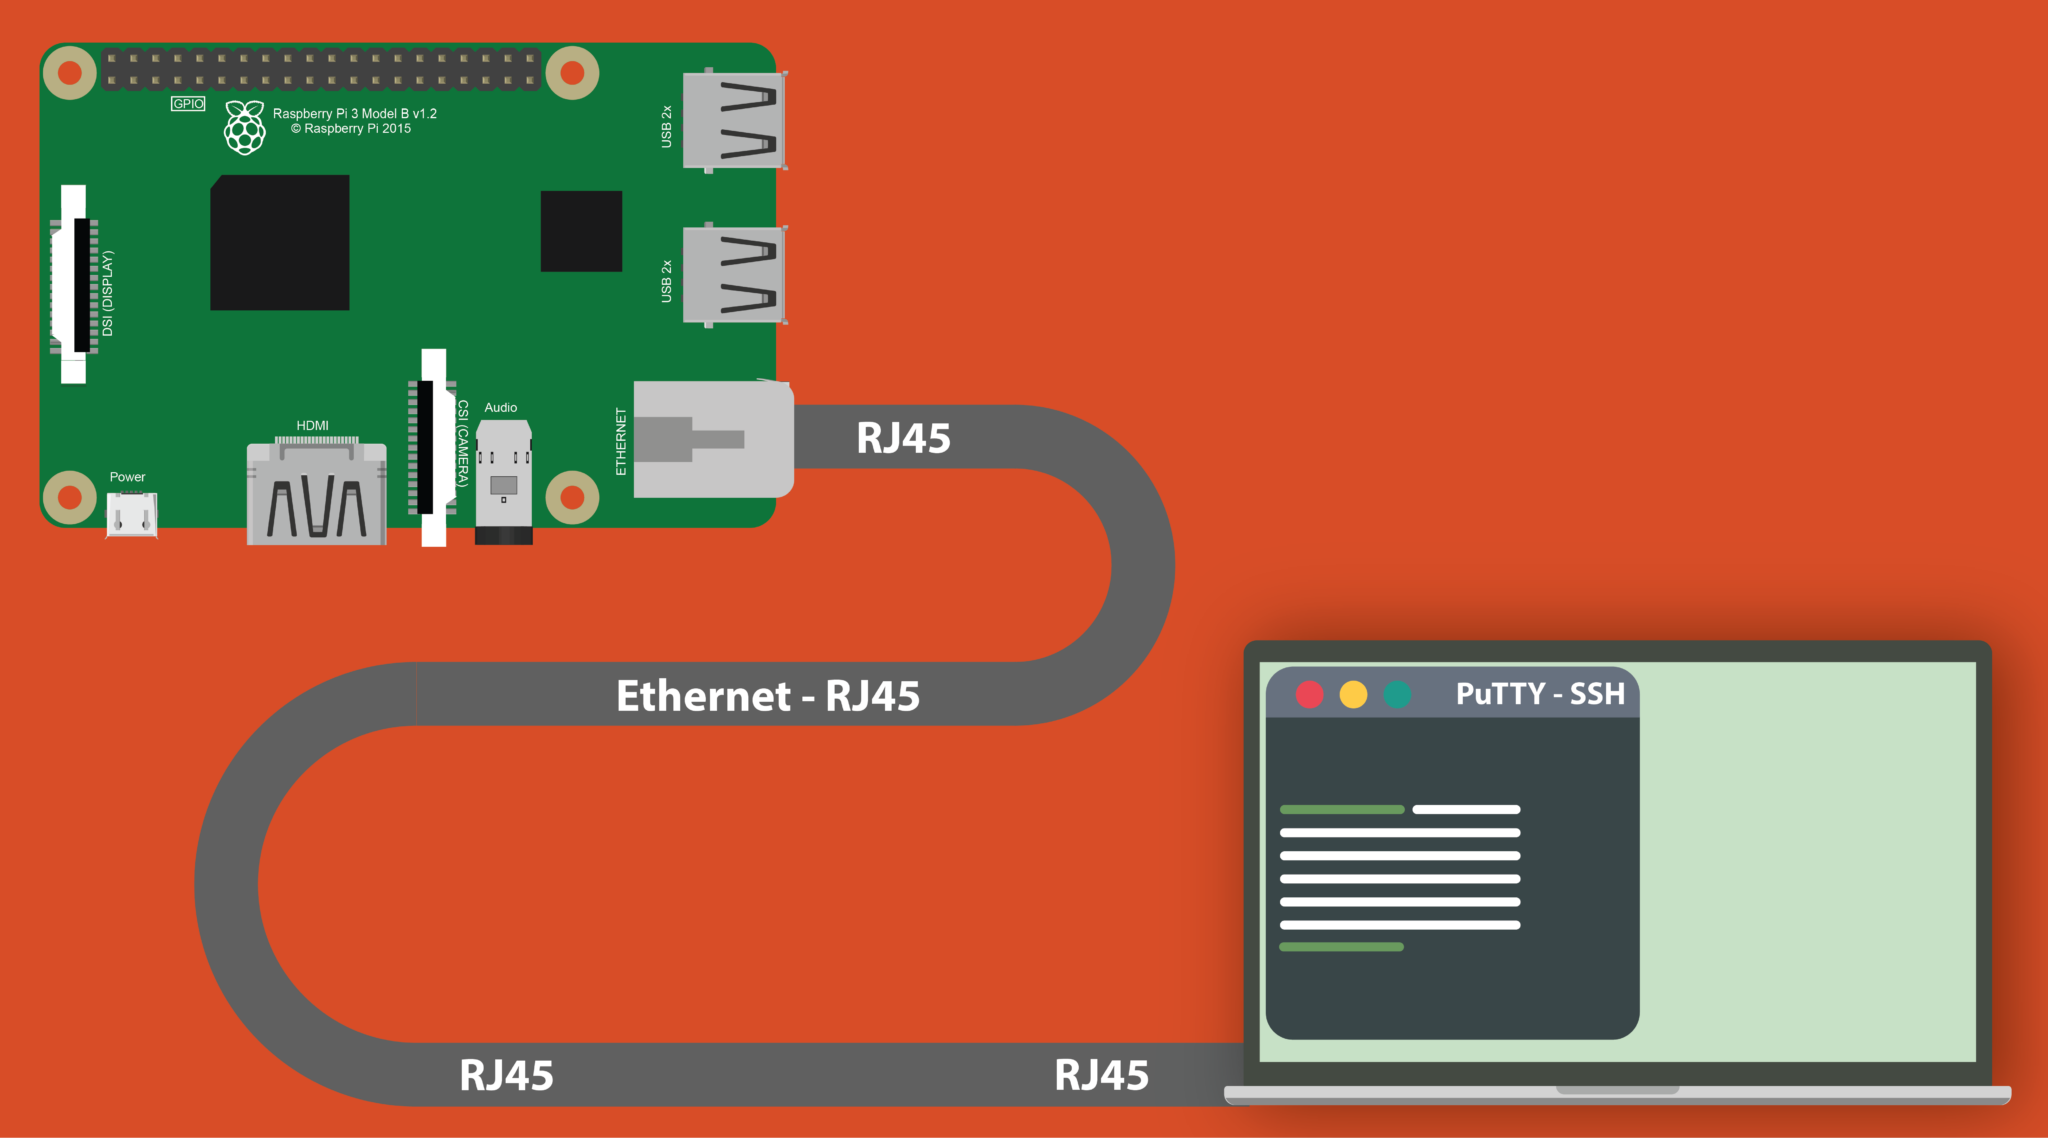
When it comes to SSH Raspberry Pi, the protocol enables users to access the command line of their Raspberry Pi remotely. This means you can manage your device from anywhere in the world, as long as you have an internet connection. SSH Raspberry Pi is particularly useful for automating tasks, managing files, and configuring settings without needing to be physically present with the device.
Why Use SSH Raspberry Pi?
- Remote Access: SSH Raspberry Pi allows you to control your device from anywhere, making it ideal for remote work and IoT projects.
- Security: Unlike older protocols, SSH encrypts all data transmitted between devices, protecting sensitive information from interception.
- Automation: With SSH Raspberry Pi, you can automate tasks and scripts, saving time and increasing efficiency.
Setting Up SSH on Raspberry Pi
Before you can start using SSH Raspberry Pi, you need to enable the SSH service on your device. This process is straightforward and can be completed in just a few steps.
Enabling SSH on Raspberry Pi
To enable SSH Raspberry Pi, follow these steps:
- Using Raspberry Pi Configuration: Open the Raspberry Pi Configuration tool from the Preferences menu, navigate to the Interfaces tab, and enable SSH.
- Using raspi-config: Open a terminal and type
sudo raspi-config. Navigate to Interfacing Options, select SSH, and enable it. - Using Boot File: Create an empty file named "ssh" in the boot partition of your Raspberry Pi's SD card. This will automatically enable SSH on the next boot.
Connecting to Raspberry Pi via SSH
Once SSH is enabled, you can connect to your Raspberry Pi using an SSH client like PuTTY (Windows) or Terminal (macOS/Linux). Use the following command to connect:
ssh pi@raspberrypi.localReplace "pi" with your username if you've changed it, and "raspberrypi.local" with your device's IP address or hostname.
Read also:The Von Trapp Family A Legacy That Resonates Through Generations
Configuring SSH for Secure Access
While enabling SSH Raspberry Pi is straightforward, configuring it for secure access requires additional steps to protect your device from unauthorized access.
Changing Default Credentials
One of the first steps in securing SSH Raspberry Pi is changing the default username and password. The default username is "pi" and the password is "raspberry," which are well-known and can be easily exploited by attackers.
To change your password, use the following command:
passwdFollow the prompts to set a new, strong password. Consider using a password manager to generate and store complex passwords.
Using SSH Keys for Authentication
For enhanced security, consider using SSH keys instead of passwords. SSH keys provide a more secure method of authentication and eliminate the risk of brute-force attacks.
To generate an SSH key pair, use the following command on your local machine:
ssh-keygen -t rsa -b 4096Follow the prompts to save the key pair. Then, copy the public key to your Raspberry Pi using:
ssh-copy-id pi@raspberrypi.localFinally, disable password authentication by editing the SSH configuration file:
sudo nano /etc/ssh/sshd_configSet the following options:
PasswordAuthentication no ChallengeResponseAuthentication noRestart the SSH service to apply changes:
sudo systemctl restart sshTroubleshooting Common SSH Issues
Despite its reliability, SSH Raspberry Pi users may occasionally encounter issues. Understanding common problems and their solutions can save time and frustration.
Connection Refused Errors
A "Connection refused" error typically indicates that the SSH service is not running or the port is blocked. To resolve this:
- Check SSH Status: Use
sudo systemctl status sshto verify that the SSH service is active. - Verify Port Configuration: Ensure that the SSH port (default 22) is open and not blocked by a firewall.
- Check IP Address: Confirm that you're using the correct IP address or hostname for your Raspberry Pi.
Permission Denied Errors
"Permission denied" errors often occur due to incorrect credentials or misconfigured SSH settings. To troubleshoot:
- Verify Credentials: Double-check your username and password or SSH key.
- Check SSH Configuration: Ensure that the SSH configuration file allows your user to connect.
- Review Logs: Check the SSH logs for more detailed error messages using
sudo journalctl -u ssh.
Advanced SSH Features
Once you've mastered the basics of SSH Raspberry Pi, you can explore advanced features that enhance functionality and convenience.
Port Forwarding with SSH
SSH port forwarding allows you to securely tunnel network traffic through an SSH connection. This is useful for accessing services on your Raspberry Pi that are not directly exposed to the internet.
To set up local port forwarding, use the following command:
ssh -L [local_port]:[remote_host]:[remote_port] pi@raspberrypi.localFor example, to access a web server running on your Raspberry Pi's port 8080:
ssh -L 8080:localhost:8080 pi@raspberrypi.localSSH Tunneling for Secure Browsing
SSH tunneling can also be used to secure your internet browsing by routing traffic through your Raspberry Pi. This is particularly useful when using public Wi-Fi networks.
To create an SSH tunnel for browsing, use:
ssh -D [local_port] pi@raspberrypi.localConfigure your browser to use the SOCKS proxy on the specified local port.
SSH Security Best Practices
Maintaining the security of your SSH Raspberry Pi setup is crucial, especially if your device is exposed to the internet. Implementing best practices can significantly reduce the risk of unauthorized access.
Disabling Root Login
Allowing root login via SSH is a significant security risk. Disable root login by editing the SSH configuration file:
sudo nano /etc/ssh/sshd_configSet the following option:
PermitRootLogin noRestart the SSH service to apply changes:
sudo systemctl restart sshUsing Fail2Ban to Prevent Brute-Force Attacks
Fail2Ban is a tool that monitors log files for repeated failed login attempts and bans the offending IP addresses. Install Fail2Ban using:
sudo apt-get install fail2banConfigure Fail2Ban by editing its configuration file:
sudo nano /etc/fail2ban/jail.localAdd the following settings:
[sshd] enabled = true maxretry = 3 bantime = 3600Restart Fail2Ban to apply changes:
sudo systemctl restart fail2banManaging Multiple Raspberry Pi Devices
If you're managing multiple Raspberry Pi devices, SSH Raspberry Pi becomes an invaluable tool for streamlining administration tasks. Efficient management requires organization and automation.
Using SSH Config Files
SSH config files allow you to define shortcuts and settings for connecting to multiple devices. Create or edit the SSH config file on your local machine:
~/.ssh/configAdd entries for each Raspberry Pi:
Host pi1 HostName 192.168.1.10 User pi IdentityFile ~/.ssh/id_rsa_pi1 Host pi2 HostName 192.168.1.11 User pi IdentityFile ~/.ssh/id_rsa_pi2Now, you can connect to each device using:
ssh pi1Automating Tasks with SSH and Bash Scripts
Automating repetitive tasks can save time and reduce errors. Create a bash script to execute commands on multiple Raspberry Pi devices:
#!/bin/bash for host in pi1 pi2 pi3; do echo "Updating $host..." ssh $host 'sudo apt-get update && sudo apt-get upgrade -y' doneSave the script and make it executable:
chmod +x update_pis.shRun the script to update all devices:
./update_pis.shUsing SSH for Remote Development
SSH Raspberry Pi is not just for system administration; it's also a powerful tool for remote development. Developers can leverage SSH to code, test, and deploy applications directly on their Raspberry Pi devices.
Setting Up a Development Environment
Before you begin remote development, ensure that your Raspberry Pi has the necessary tools and libraries installed. Common development tools include:
- Python: Pre-installed on Raspberry Pi OS.
- Node.js: Install using
sudo apt-get install nodejs. - Git: Install using